Open Field Farm

Open Field Farm is a community supported farm in Petaluma, California, raising grass fed Corriente beef, pastured eggs, mixed vegetables, flowers, herbs, and dry corn.
  • Farm
  • History
  • Food
  • CSA
    • About the CSA
    • Membership
  • Practices
  • Farmers
  • Blog
  • Farm
  • History
  • Food
    • About the CSA
    • Membership
  • Practices
  • Farmers
  • Blog

Blog

Each week we will post our newsletter and pick list on the blog. We will also add posts with recipes and farm updates here.

IMG_1751.jpg

Clean Up

Open Field Farm May 19, 2020

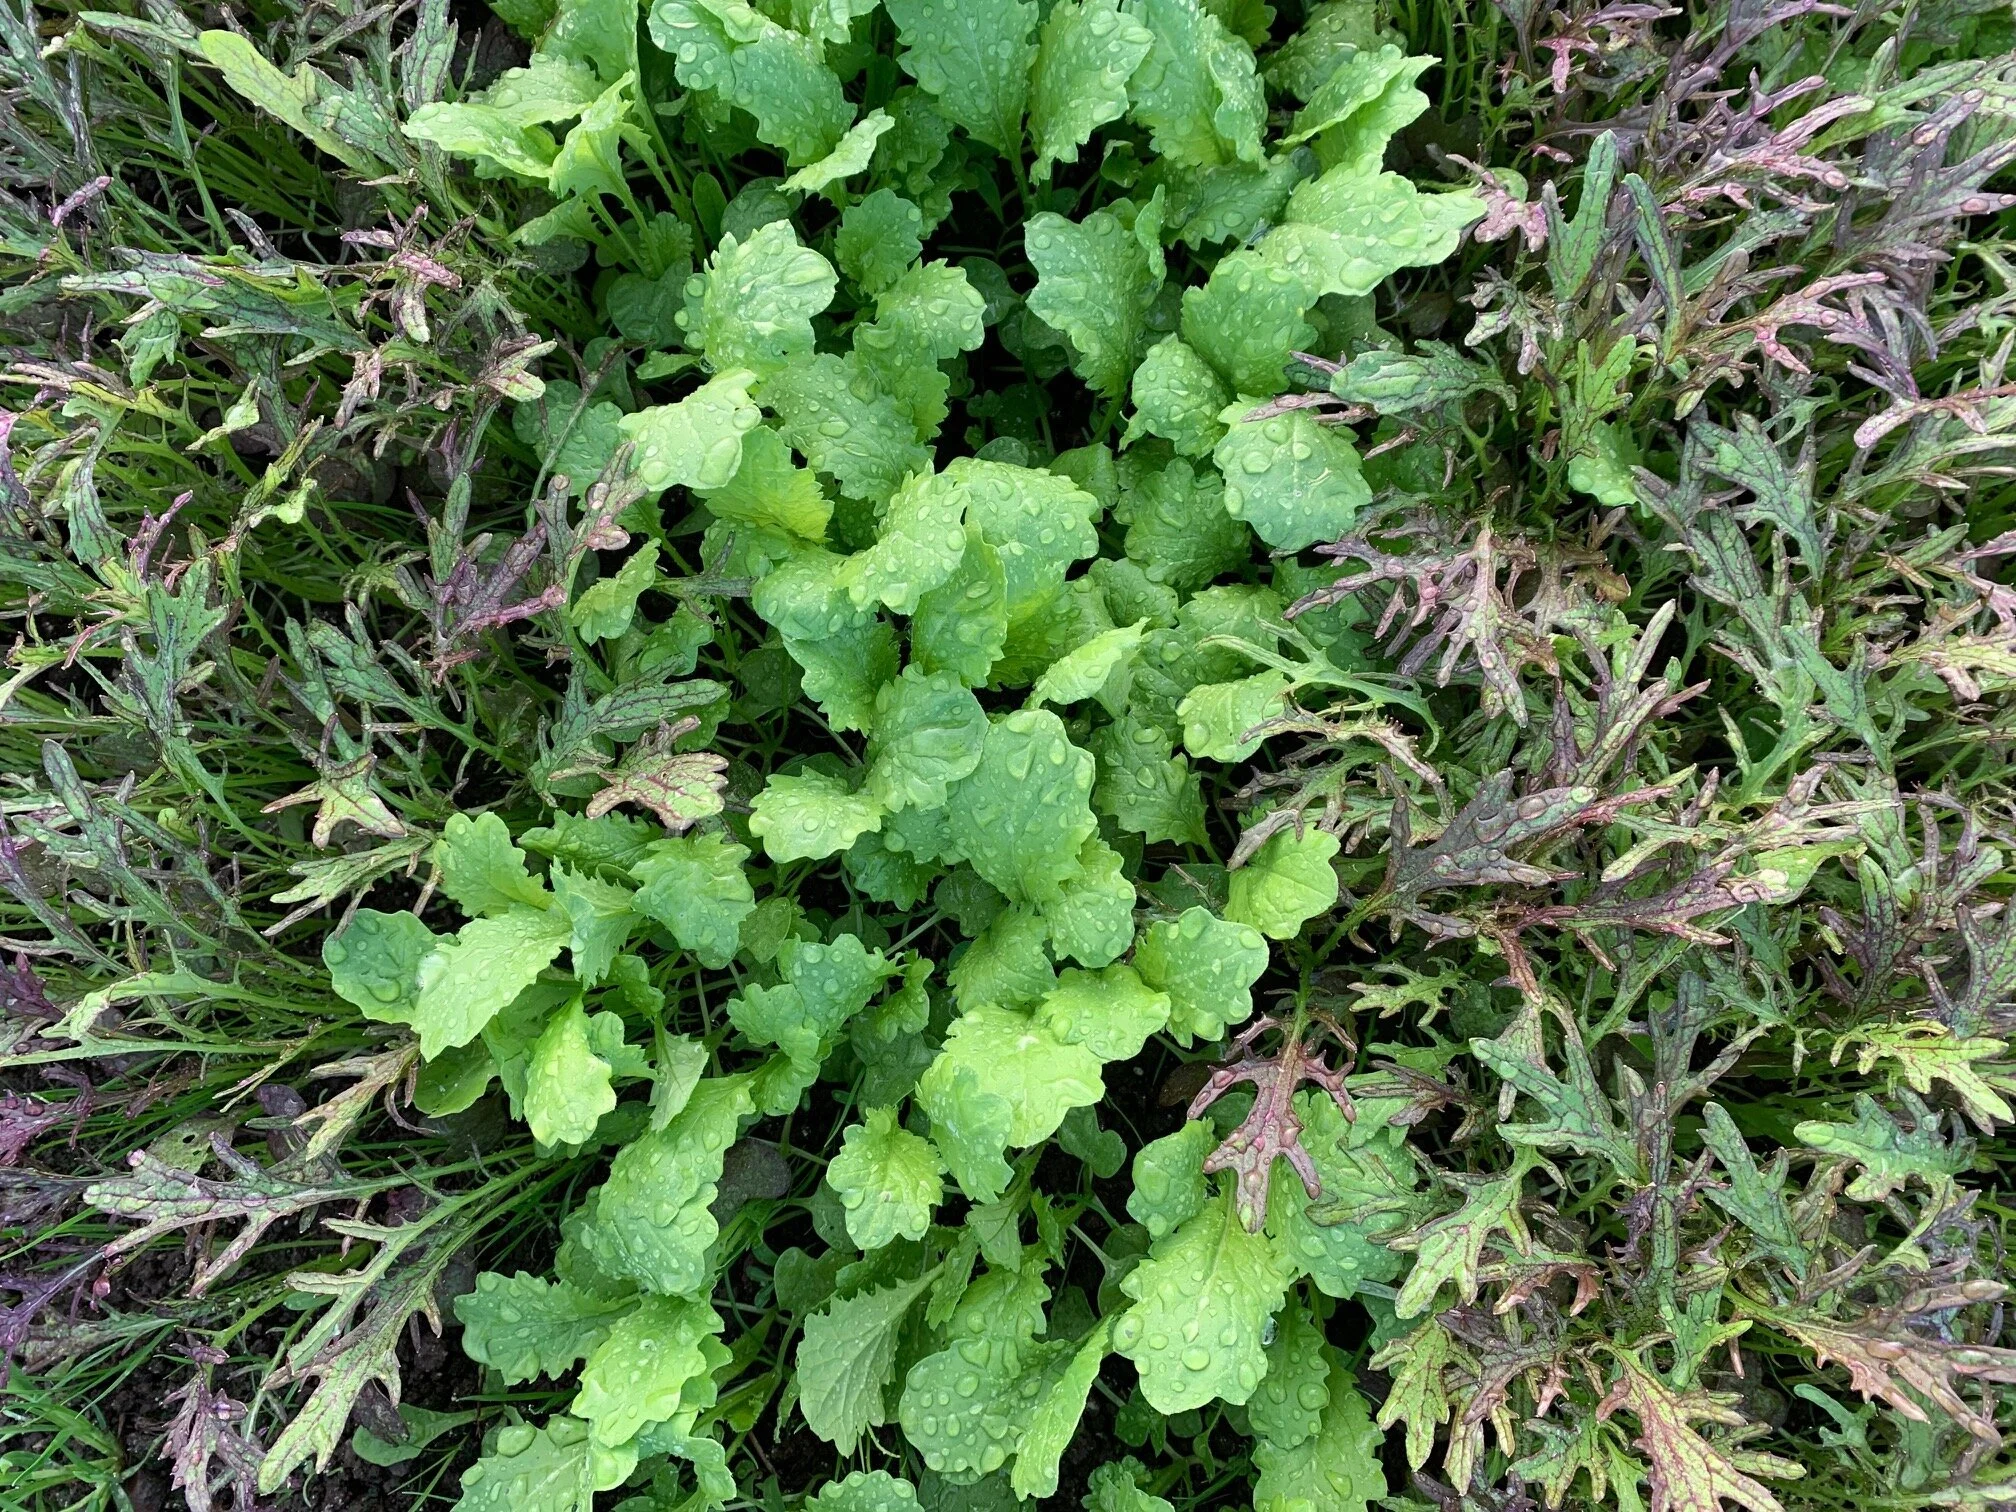
We have a break in planting this week to focus on weeding, cultivating, and other projects. Most of the plants in the fields have taken root and are starting to take off in growth. Everything is glowing after the glorious rain.

We are tidying the herb room as well. With the first harvests of this season already dried and jarred, we are working to empty the herb room of last year’s harvest. We made one last big mix of oats, anise hyssop, tulsi, chamomile, and spearmint to give out in larger bags this week. Next week, we will have bulk bags of single herbs. Pascale cleaned all the jars so they are ready to be filled again.

There was a beautiful white calf born in the herd this week! It is a stunning sight to see.

IMG_1748.jpg

This week’s pick list:

  • Eggs

  • Onions

  • Scallions

  • Arugula

  • Spinach

  • Beets

  • Fennel

  • Lettuce

  • Kale

  • Dried tea herbs

  • Dried ground peppers

  • Revolution Bread

  • Olive Oil

IMG_1753.jpg

Spinach Pasta, smitten kitchen.com

  • 5 ounces baby spinach leaves

  • 2 3/4 to 3 cups flour (we use our sonora flour but we sift it first to remove the large bran flakes.)

  • 1/2 teaspoon sea salt or kosher salt

  • 3 large eggs

  • 3 large egg yolks

  • Water (only if absolutely needed)

  • Additional flour for rolling

Wash spinach but no need to dry. With water droplets still clinging to the leaves, wilt spinach in a hot skillet until completely soft, about 4 minutes. Let cool and wring all the water — seriously, every drop you can get out — out of the spinach in small fistfuls, and then pressing these little bundles out against a fine-mesh strainer. Rest spinach on paper towels to remove even more water, then mince spinach on a cutting board.

Dump spinach, smaller amount of flour and salt on countertop and mix with your fingers, then form into a pile. Make a deep well in the center and add the whole eggs and yolks to it. Use your fingertips to break up the eggs and begin moving your fingers in a circular motion, keeping the eggs within the well (or you’ll have egg lava running everywhere and be in a very bad mood). Each circular movement pulls in a little bit of flour from the sides. In a few minutes, the mixture will become thicker and thicker, finally becoming too tight to move easily with your fingers. At this point, you can use a bench scraper (a perfect tool here) or spatula to start adding the remaining, a little pile at a time. Once a shaggy dough has formed, begin kneading the mixture, scraping it up when it sticks, until a ball is formed. It will look flaky but will hold together.

Knead the dough, pressing it away with the heels of your hands then forming it back into a blob, for 1 to 2 minutes, until the dough is moist but not sticky. Add remaining flour, a spoonful at a time, only if dough is too sticky. Add a drop or two of water only if it’s cracking when you knead it. In almost all cases, I find that erring on the side of firmer pasta is safer than softer pasta, which doesn’t hold shapes well and will want to stick a pasta roller. Let it rest for 5 minutes, then knead it again for 5 to 8 minutes. Wrap dough in plastic and let rest at room temperature for an hour.

Divide dough into sixths. On a floured surface, roll the pasta as thin as you can; as thin as a credit card and translucent is ideal. Letting rolled-out pasta rest for 10 minutes before cutting it into your desired shape helps yield cleaner, easier cuts.

Cook pasta in a large pot of boiling, well-salted water for anywhere from 2 to 6 minutes (depending on thickness), until al dente. Drain and toss with fixings of your choice — garlic-sizzled olive oil or melted butter, parmesan or pecorino, dollops of ricotta or mascarpone. Eat immediately.

Comment
IMG_1736.jpg

Beginning

Open Field Farm May 12, 2020

We harvested our first variety of garlic this year: inchelium red garlic. Jesse built a beautiful rafter system from which we hung the garlic rather than laying it out in the shade house. We are hopeful that by drying it inside with fans, it will cure better and last longer.

We are hoping to take as much advantage of the rain as possible to work the soil and break down some of our clods. We are so grateful for any moisture that comes!

This week’s pick list:

  • Eggs

  • Onions

  • Garlic scapes

  • Scallions

  • Pac Choi

  • Spinach

  • Beets

  • Fennel

  • Lettuce

  • Kale

  • Dried tea herbs

  • Dried ground peppers

  • Revolution Bread

  • Olive Oil!

IMG_1730.jpg

Kale Miso Pesto, from sfchronicle.com

  • 2 cups fresh kale, rinsed (If you don't have kale, you can substitute another leafy green like arugula or spinach)

  • 1 small handful fresh mint

  • ½ cup nuts (pine nuts, almonds, walnuts, pistachios or cashews)

  • 1 heaping tablespoon white miso

  • 2 cloves garlic, peeled

  • ½ cup extra-virgin olive oil

  • Kosher salt and freshly ground black pepper, to taste

Instructions: In a blender or food processor, combine the kale, basil, mint, nuts, miso and garlic and blend or process until smooth. With the machine running, add the olive oil. Add a bit of ice water as needed to achieve the proper consistency; it shouldn’t be too thick, but you don’t want it too runny, either.

Transfer to a bowl and season to taste with salt and pepper or a touch more miso. The pesto will keep in a lidded container, refrigerated, for a few days or can be frozen for up to a month (McNaughton freezes it in ice cube trays, then pops the cubes out and stores them in a ziptop freezer bag).

Comment
IMG_1708.jpg

Neighbors

Open Field Farm May 5, 2020

The sheep have been grazing around our house for the past week. It is one of my favorite times of the year. The grass is tall and full of nutrition for them. Watching the sheep all lying down, chewing their cud, and basking in the morning sun, is relaxing and fulfilling. We love to walk by our windows and see them, sometimes right up close!

We are planting onions, celery, celeriac, new potatoes, and tomatoes this week. The first round of direct seeded crops are emerging and Cecilia is cultivating them today.

This week’s pick list:

  • Eggs

  • Apples from Filigreen Farm

  • Onions

  • Garlic scapes

  • Rutabaga

  • Beets

  • Turnips

  • Lettuce

  • Kale

  • Dried tea herbs

  • Dried ground peppers

  • Revolution Bread

  • Olive Oil!

IMG_1684.jpg

Layered Yogurt Flatbreads, from smitten kitchen.com

  • 2 cups (260 grams) all-purpose flour, plus more for rolling

  • 2 teaspoons kosher salt (I use Diamond, use half of another brand, here’s why)

  • 1 teaspoon baking powder

  • 1 cup plain, full- or low-fat yogurt (Greek or regular)

  • 2 to 4 tablespoons water

  • 4 tablespoons melted, unsalted butter, olive oil, coconut oil, or ghee (for assembly)

Make dough: Combine flour, salt, and baking powder in a large bowl. Add yogurt and the first two tablespoons of water and stir to combine — you’ll have to mash it a bit to get it mixed in. For plain, non-Greek yogurt, you might need 1 more tablespoon of water to bring it together. For Greek, I needed 2 more tablespoons. Mix as best as you can with a spoon and then, if you can reach your hands into the bowl, use them to bring the dough together into a rough ball. Transfer — along with any unmixed bits — to your counter and knead into a smooth ball, about 1 to 2 minutes. Lightly flour a spot on the counter, place the ball of dough on top of it, and upend the empty bowl over it. Let rest for 30 minutes.

Layer dough: Divide dough into 8 wedges. Working with one at a time, very lightly flour your counter and roll out each into a round or oblong shape as thin as it will go — usually about 6″ in diameter. Brush thinly with 2 teaspoons butter or oil. Roll dough away from you into a thin cylinder, then wind each cylinder into a coil (it will look like a sideways snail). Place each coil of dough back on a floured spot and cover, resting for another 15 to 20 minutes; repeat with remaining pieces of dough.

Heat your oven to 300 degrees F and have a big baking sheet ready. (Flatbreads fully cook on stove, but you can keep them warm and lightly puffed in the oven.)

Cook flatbreads: Working with one coil at a time, roll into a thin round (about 5″). Brush the top with more butter, you can be a bit more generous here. Repeat with as many flatbreads as you think you can fit in your pan; leave the remaining coils continue to rest, covered.

Warm a frying pan over medium-low heat. Flip flatbread butter-side-down onto pan and cook until a deep golden brown underneath, about 5 minutes. Brush the top with more butter as it cooks on the first side, then flip and continue cooking until the same deep golden brown on the second. Transfer to baking sheet and place in oven to keep warm. Continue this process with the remaining coils and flatbreads.

Do ahead: These layered yogurt flatbreads keep perfectly in the fridge; I wrap mine in foil. Rewarm in a 300-degree oven for about 10 minutes.

Comment
IMG_1680.jpg
Open Field Farm April 28, 2020

The radishes and peas we planted last week have sprouted, a sign that more abundant food is on the horizon. Even though it will be a while until we are eating them, it is exciting to see the sprouts and to be putting plants in the ground. The buckwheat cover crop is also up!

We filled the newly built tunnel with cucumbers, eggplants, and sweet peppers last week. They are now straw mulched and trellised. We planted the first round of basil as well.

In Hawk, we will be planting the first round of brassicas: kale, cabbage, and more.

IMG_1673.jpg

This week’s pick list:

  • Eggs

  • Apples from Filigreen Farm

  • Onions

  • Green garlic

  • Fennel

  • Rutabaga

  • Beets

  • Turnips

  • Scallions

  • Pac Choy

  • Lettuce

  • Kale

  • Spinach

  • Dried tea herbs

  • Dried ground peppers

  • Revolution Bread

  • Olive Oil!

IMG_1682.jpg

Beet Rosti with Rosemary, from nytimes.com

  • 2 pounds beets (3 very large or 4 to 6 medium)

  • 2 teaspoons coarsely chopped fresh rosemary

  • Salt and freshly ground pepper to taste

  • ½ cup flour

  • 2 tablespoons butter

  • Minced parsley or a few rosemary leaves for garnish

Trim beets, and peel them as you would potatoes; grate them in food processor or by hand. Begin preheating 12-inch nonstick skillet over medium heat.

Toss grated beets in bowl with rosemary, salt and pepper. Add about half the flour; toss well, add rest of flour, and toss again.

Put butter in skillet; heat until it begins to turn nut-brown. Scrape beet mixture into skillet, and press with spatula to form a round. With medium to medium-high heat -- the pancake should gently sizzle -- cook, shaking pan occasionally, until bottom of cake is nicely crisp, 8 to 10 minutes. Slide cake onto a plate, top with another plate, invert the two plates, and return cake to pan. Keep cooking, adjusting heat if necessary, until other side is browned, another 10 minutes or so. Garnish, cut into wedges, and serve hot or at room temperature.

Comment
IMG_1650.jpg

Egg helpers

Open Field Farm April 21, 2020

We planted our first seeds in the fields: sugar snap and english peas, plus transplanted fennel, lettuce, and scallions. Tomorrow we will seed the first round of carrots, beets, and more.

Since the farm is ramping up in activity and the kids are home from school, they are helping to wash the eggs each day. Teddy, Oliver, and I wash 3 days a week and Margrethe does the other two. It is a good way to start the day, except Margrethe does it much later than us!

The chickens are starting to move this week. We are excited to see them back on grass. We have 15 or so baby calves, all different colors and sizes.

IMG_1572.jpg

This week’s pick list:

  • Eggs

  • Apples from Filigreen Farm

  • Onions

  • Green garlic

  • Fennel

  • Rutabaga

  • Beets

  • Radish

  • Turnips

  • Scallions

  • Pac Choy

  • Lettuce

  • Kale

  • Chard

  • Spinach

  • Dried tea herbs

  • Dried ground peppers

  • Revolution Bread

  • Olive Oil!

Swiss Chard Tahini Dip, from bonapetit.com

  • 2 bunches Swiss chard (about 1½ lb.)

  • ⅔ cup extra-virgin olive oil, divided, plus more

  • 2 green garlic, finely chopped

  • ½ cup tahini

  • ⅓ cup fresh lemon juice

  • Kosher salt

Remove ribs and stems from Swiss chard leaves and finely chop. Tear leaves into small pieces. Set both aside separately.

Heat ⅓ cup oil in a large pot over medium-low. Cook reserved ribs and stems, stirring often and adding a splash of water if they start to brown, until tender, 5–7 minutes. Add garlic; cook, stirring, until fragrant, about 1 minute. Add reserved chard leaves by the handful, letting them wilt before adding more; cook, tossing, until all the leaves are wilted and tender, 10–12 minutes total. Let cool. Squeeze excess liquid from mixture into a measuring glass. (You should have about ½ cup liquid.)

Place Swiss chard mixture and 1 Tbsp. cooking liquid in a food processor and add tahini, lemon juice, and ⅓ cup oil. Season with salt and process, adding more cooking liquid if needed, until dip is creamy and only speckles of chard remain. This could take up to 5 minutes. Season with more salt if needed.

Transfer dip to a serving bowl and drizzle with more oil. Serve with flatbread and lemon wedges.

Comment
FullSizeRender-2.jpeg

Tea cakes and rainbows

Open Field Farm April 13, 2020

Watching Kelsey and Celeste make tea blends, it looked like beautiful layers of a cake in the jar! On Sunday we spotted of a rainbow that ended right on top of the new tunnel Matt and Tim are building, where we are about to plant our first succession of tomatoes, peppers, eggplant, and cucumbers next week. We are grateful for all the beauty that is around us.

We spaded our first field for the second time today. Next we will bury the irrigation header, shape beds, and hope to direct seed our first round of crops on Thursday. But that may be too ambitious. It is an early spring and it seems everything is colliding, the to do list is so long.

The pick list is shrinking as the overwintered crops are fading away. The tunnels are producing beautiful greens that we hope to continue until we have fresh produce from the fields. The benefit of the dry winter and early spring is that we can plant earlier and have more food for you soon.

This week’s pick list:

  • Eggs

  • Apples from Filigreen Farm

  • Onions

  • Green garlic

  • Parsnips

  • Rutabaga

  • Beets

  • Radish

  • Turnips

  • Celery

  • Scallions

  • Pac Choy

  • Lettuce

  • Kale

  • Chard

  • Spinach

  • Arugula

  • Dried tea herbs

  • Dried ground peppers

  • Revolution Bread

  • Olive Oil!

IMG_1622.jpg

SPINACH WITH SORREL, MINT, AND ANCHOVY from nytimes.com

  • 2 tablespoons extra virgin olive oil

  • 4 anchovy fillets

  • 1 medium shallot, finely chopped

  • 1 large bunch (about 1 pound) spinach, trimmed and washed

  • 1 cup gently packed, thinly slivered sorrel leaves

  • 1/4 cup coarsely chopped spearmint

  • 1/4 teaspoon salt

  • Freshly ground black pepper

1. In a large skillet, heat oil over medium-low heat. Add anchovies and shallot, and cook, stirring and mashing anchovy fillets with the back of a spoon until the shallot is softened but not browned and the anchovy is dissolved.

2. Add as much spinach as will fit in pan, increase heat to medium-high, and toss spinach with tongs until it is wilted. Add remaining spinach, along with sorrel, mint and salt. Continue to toss until all the spinach is wilted and most of the liquid has cooked off, about 3 minutes. Taste, and adjust seasoning with salt and pepper. Serve.

Comment
IMG_1591.jpg

Cobwebs

Open Field Farm April 7, 2020

Cecilia cleaned the pump house which was full of cobwebs and other creatures. It looks amazing! I wish I had before and after pictures. Cecilia and Jesse also changed the sand in the filters and we are slowly getting the irrigation system ready for planting.

Sam, Monique, and Sarah H. have been prepping the old artichoke beds to be planted with asparagus, rhubarb, and horseradish. We abandoned growing perennial artichokes in the beds as the gophers still attacked the artichokes through the gopher baskets!

We took a walk on Sunday to visit the mother cows. The calves with their pink noses were curious about us but also stayed close to their moms.

IMG_1557.jpg
  • Cabbage

  • Cauliflower

  • Spinach

  • Beets

  • Chard

  • Castelfranco Chicory

  • Radish

  • Turnips

  • Rutabaga

  • Fennel

  • Lettuce

  • Arugula

  • Onions

  • Green garlic

  • Celery

  • Parsnips

  • Leeks

  • Dried tea herbs

  • Dried ground peppers

  • Revolution Bread

  • Olive Oil!

IMG_1587.jpg

Savory Onion Cake (adapted from Classic German Baking by Luisa Weiss)

This onion cake becomes very sweet thanks to caramelized onions. It pairs beautifully with a bitter green salad a steak.

DOUGH
- 1 2/3 cups, scooped and leveled plus more for kneading
- 1 teaspoon instant yeast
- pinch of salt
- ½ cup water
- 1 teaspoon salt
- 2 teaspoon oil

TOPPING
- about 1 pound yellow onions 
- 4 tablespoon oil
- 2 ½ oz bacon OR cheese for vegetarian option cut in small pieces
- ½ to 1 teaspoon caraway seeds OR cumin seeds
- fresh ground pepper
- 2 eggs

To make the dough: Place flour in a large bowl and make a well in the middle. Put yeast and sugar in the middle. Slowly pour in water, stirring gentle with a fork. Keep stirring adding the salt and 2 Tablespoon oil. 
As soon as you have a shaggy dough dump it out on a lightly floured surface and knead vigorously until dough is smooth and silky, 4 -5 minutes. Resist adding more flour; you want the dough to remain as soft as possible. Put dough in an oiled bowl, cover with wet dishcloth. Place in a warm, draft free spot for 1 -2 hours.

Grease a 10 inch cake pan 

After dough has risen place it in the pan. Gentle push dough down and out to cover the bottom of the pan and make a small rim, about ¼ inch. Take care not to stretch the dough so much as simply spread it out with your fingertips. The dough should be even and slightly dimpled. Cover with same dishcloth and set aside for additional 30 minutes.

While the dough is resting, heat oven to 400F and prep topping. Thinly slice onions into rings. Heat the oil in a medium skillet and add the diced speck (Let the speck render for a few minutes then add onions). If not using Speck add your onions, seeds and season with pepper. Sautee over medium until onions soften, translucent, and take on some color, 10-20 minutes (the longer they sautee the sweeter they get). Take off pan and cool slightly.

In a small bowl, beat the eggs and add slightly cooled onions and cheese and mix together. When dough is finished resting pour onion mixture on top of dough and spread evenly. Bake for 40 minutes, rotating half way through. If the onions are browning too fast cover the cake with a piece of aluminum foil. 

After 40 minutes, if the top is not too dark turn on broiler for a short moment until the cake has your desired browning (I like mine slightly charred in some areas).

Remove pan and let cool. Serve immediately or store in fridge. Can be reheated at 350F for 5 minutes.

Comment
IMG_1573.jpg

A Pause

Open Field Farm March 31, 2020

This spell of cool and wet weather has been lovely. While it is not bringing a huge amount of rain, it is still providing us with a break from the warm weather of recent, allowing the grass to grow and the moisture to stay in the ground.

We are tilling our first field tomorrow. We have honestly not tilled this early before or with rain in the forecast but we are excited to see what happens. We are hopeful that it will help break down the large amount of grass and will make our first beds easier to plant.

IMG_1564.jpg
  • Cabbage

  • Cauliflower

  • Kale

  • Beets

  • Chard

  • Castelfranco Chicory

  • Radish

  • Turnips

  • Rutabaga

  • Kohlrabi

  • Celeriac

  • Arugula

  • Onions

  • Green garlic

  • Celery

  • Parsnips

  • Leeks

  • Dried tea herbs

  • Dried ground peppers

  • Revolution Bread

  • Olive Oil!

IMG_1566.jpg

One-Pot Mujadara With Leeks and Greens, from nytimes.com

  • 1 cup brown or green lentils

  • 2 leeks, white and light green parts only, roots trimmed

  • 2 ¼ teaspoons salt, more as needed

  • ¼ cup extra-virgin olive oil

  • ! green garlic, thinly sliced

  • ¾ cup long-grain rice

  • 1 ½ teaspoons ground cumin

  • ½ teaspoon ground allspice

  • ¼ teaspoon cayenne

  • 1 bay leaf

  • 1 cinnamon stick

  • 4 cups trimmed and chopped spring greens (chard leaves, spinach, kale, mustard or a combination)

Place lentils in a large bowl and add warm tap water to cover by 1 inch. Let soak.

Meanwhile, halve leeks lengthwise; run under warm water to release any grit. Thinly slice leeks crosswise.

Heat oil in a Dutch oven or large pot over medium-high heat. Add leeks and cook, stirring occasionally, until golden brown and crispy, 5 to 10 minutes. Transfer half the leeks to a bowl to use for garnish and sprinkle with 1/4 teaspoon salt.

Stir garlic into the pot with the remaining leeks and cook for 15 seconds until fragrant. Stir in rice and sauté 2 minutes. Stir in cumin, allspice and cayenne; sauté 30 seconds.

Drain lentils and stir into pot. Add 4 1/4 cups water, 2 teaspoons salt, bay leaf and cinnamon stick. Bring to a simmer. Cover and cook over low heat for 15 minutes. Rinse greens in a colander and spread damp leaves over lentil mixture. Cover and cook 5 minutes more, until rice and lentils are tender and greens are wilted. Remove from heat and let stand, covered, for 5 minutes. Serve sprinkled with reserved crispy leeks.

Comment
IMG_1538.jpg

Sunflower Sprout

Open Field Farm March 24, 2020

In times of uncertainty, I am grateful for the grounding work of farming. When the fear of the future fills me, I take a walk through the fields, asking the plants for guidance. I often slip off my shoes, feeling the ground beneath my feet. Currently it is wet and slimy, although dry in some places. I found a sunflower sprout in the drainage behind the CSA barn and encountered many creatures: rabbits, snakes, birds, and insects.

We are gearing up to till our fields next week as there is no rain in the forecast. It is heartbreaking to proceed knowing the pond has not recharged and so much seems to be in question. Yet we are also more inspired to grow food for our community. We are still praying that more rain comes, prolonging the grass season and providing us with more water security moving forward.

IMG_1544.jpg
  • Cabbage

  • Broccoli

  • Cauliflower

  • Kale

  • Beets

  • Chard

  • Castelfranco Chicory

  • Radish

  • Turnips

  • Rutabaga

  • Kohlrabi

  • Celeriac

  • Lettuce

  • Onions

  • Green garlic

  • Pac Choy

  • Parsnips

  • Leeks

  • Dried tea herbs

  • Dried ground peppers

  • Revolution Bread

  • Olive Oil!

IMG_1517.jpg

Spring Tart with Bacon, Green Garlic, Leek, and Gruyere, from food52.com

For the crust:

  • 1 1/2 cup flour

  • 1/4 teaspoon fine sea salt

  • 10 tablespoons very cold, unsalted butter (5 ounces, 1 cube plus 2 tablespoons), cut into 10 or 12 pieces

  • 1 egg, beaten

For the filling:

  • 3 strips bacon, diced

  • 2 large leeks (white parts), sliced in half lengthwise, then across into 1/8 inch strips

  • 2 tablespoons chopped green garlic

  • 1 pinch fine sea salt

  • 3 eggs

  • 1/2 cup sour cream

  • 1/2 teaspoon fresh thyme leaves, plus sprigs for garnish

  • 1/4 teaspoon freshly ground black pepper

  • 3 ounces Gruyere cheese, shredded

To make the tart crust, add both flours and salt to the bowl of a food processor; pulse a few times to combine. Sprinkle butter over top and pulse several times until the largest butter pieces you see are a bit larger than a pea. Pour egg over flour mixture and pulse several times, until clumps begin to form. Turn mixture out onto a work surface. Quickly gather the dough together into a ball, knead it just enough so that you can form it into a 6" disc. Wrap in plastic and refrigerate for 30 minutes.

After 30 minutes, transfer the tart dough to a work surface lightly sprinkled with flour. Roll dough into a 12 inch round; lift and turn the dough often to keep it from sticking. Place your rolling pin over one end of the dough round and roll it up. Unroll the dough over a 9" tart pan with a removable bottom, doing your best to center it. Gently press dough on bottom and sides of pan (patch any torn or short areas); trim dough to 1/2 inch overhang. Fold overhang to create a double-thick edge and pierce all over with a fork. Cover with plastic wrap and freeze for at least 1/2 an hour, preferably longer (see headnote).

When you're ready to bake the crust, preheat oven to 400 degrees. Trim a piece of foil to fit and place on bottom crust. Cover foil with pie weights (whole beans that you don't plan to cook work well too). Bake for 10 minutes. Remove foil and weights. Return crust to oven and reduce heat to 375 degrees; bake 20 minutes more. Remove from oven and set aside. (If your filling is ready, you can pour it right in and bake.)

For the filling, heat a large skillet over medium heat. Add bacon; cook and stir until fat begins to render, about 3 minutes. Add leeks, green garlic, and a pinch of salt. Cook and stir about 10 minutes more, until leeks and garlic are soft and bacon is cooked through. Set aside.

In a medium bowl, whisk together eggs, sour cream, thyme, and pepper. Stir in Gruyere and bacon mixture. Pour into crust and bake at 375 degrees for 15 to 20 minutes, or until set in the center.

Remove from oven; transfer to serving platter and garnish with thyme sprigs. Slice into wedges and serve warm or at room temperature.

Comment
IMG_1464.jpg

Time Change

Open Field Farm March 10, 2020

Now that it is lighter later in the day it truly feels that spring has arrived. We are not quite ready to let go of winter as we need more rain but we are still hopeful that more will come.

When the time changes, I always wonder about the animals who do not use the clocks but who are still rhythmic and attuned to the seasons. Our habits change, as we feed and do chores an hour later, but we have no way to communicate why. Even the cat and dog who live inside are confused.

Important Dates:

We are closed next week March 16th-20th!

Summer hours begin the week after our break: we will be open until 7 pm starting March 23rd.

All Member Meeting Wednesday April 15th (Adults only event)

IMG_1460.jpg

This week’s pick list:

  • Cabbage

  • Winter squash

  • Kale

  • Beets

  • Chard

  • Castelfranco Chicory

  • Radish

  • Turnips

  • Rutabaga

  • Kohlrabi

  • Celeriac

  • Lettuce

  • Onions

  • Fennel

  • Pac Choy

  • Parsnips

  • Leeks

  • Dried tea herbs

  • Dried ground peppers

  • Revolution Bread

  • Olive Oil!

IMG_1466.jpg

Fall Apart Caramelized Cabbage, from bonappetit.com

  • ¼ cup double-concentrated tomato paste

  • 3 garlic cloves, finely grated

  • 1½ tsp. ground coriander

  • 1½ tsp. ground cumin

  • 1 tsp. crushed red pepper flakes

  • 1 medium head of green or savoy cabbage (about 2 lb. total)

  • ½ cup extra-virgin olive oil, divided

  • Kosher salt

  • 3 Tbsp. chopped dill, parsley, or cilantro

  • Full-fat Greek yogurt or sour cream (for serving)

Preheat oven to 350°. Mix tomato paste, garlic, coriander, cumin, and red pepper flakes in a small bowl.

Cut cabbage in half through core. Cut each half through core into 4 wedges.

Heat ¼ cup oil in a large cast-iron skillet over medium-high. Working in batches if needed, add cabbage to pan cut side down and season with salt. Cook, turning occasionally, until lightly charred, about 4 minutes per side. Transfer cabbage to a plate.

Pour remaining ¼ cup oil into skillet. Add spiced tomato paste and cook over medium heat, stirring frequently, until tomato paste begins to split and slightly darken, 2–3 minutes. Pour in enough water to come halfway up sides of pan (about 1½ cups), season with salt, and bring to a simmer. Nestle cabbage wedges back into skillet (they should have shrunk while browning; a bit of overlap is okay). Transfer cabbage to oven and bake, uncovered and turning wedges halfway through, until very tender, liquid is mostly evaporated, and cabbage is caramelized around the edges, 40–50 minutes.

Scatter dill over cabbage. Serve with yogurt alongside.

Comment
IMG_1439.jpg

Green shoots

Open Field Farm March 3, 2020

The perennials that we seeded in the greenhouse in January are slowly starting to grow, and some are just emerging. The small and delicate seedlings need cold nights to germinate and take a long time to develop. We enjoy starting them each year and watching patiently as they transform into plants.

Important Dates:

We are closed March 16th-20th!

Summer hours begin the week after our break: we will be open until 7 pm starting March 23rd.

All Member Meeting Wednesday April 15th (Adults only event)

This week’s pick list:

  • Cabbage

  • Winter squash

  • Spigariello

  • Beets

  • Chard

  • Carrots

  • Sugarloaf and Radicchio

  • Radish

  • Turnips

  • Rutabaga

  • Kohlrabi

  • Celeriac

  • Celery

  • Onions

  • Scallions

  • Pac Choy

  • Parsnips

  • Leeks

  • Dried tea herbs

  • Dried ground peppers

  • Revolution Bread on Friday only

  • Olive Oil!

Sauteed Spigariello, from latimes.com

  • 2 bunches of spigariello

  • 1/4 cup extra virgin olive oil

  • 3/4 teaspoon kosher salt

  • 3 garlic cloves, minced (about 2 tablespoons)

  • Pinch red pepper flakes

  • 1 teaspoon good balsamic or apple cider vinegar

Wash the spigarello thoroughly. Pull the leaves off the stems, grabbing the leaves from the top of the stem and pulling toward the bottom to remove (in the same way you’d strip rosemary needles). Discard the stems. Bring a large pot of salted water to a boil. Add the spigarello, return to a boil and blanch for 3 to 5 minutes, until the greens wilt slightly and bend easily in the pan. Drain in a colander.

Heat the olive oil in a large heavy skillet over medium-high heat. Add the spigarello, season with salt and saute until slightly crispy, about 3 to 5 minutes.

Stir in the garlic and red pepper flakes, turn off the heat and let stand for about 1 minute, stirring often. (If the pan is too thin to hold much heat, cook over low heat for 1 minute after adding the garlic and pepper flakes.) Sprinkle with vinegar and toss lightly. Serve warm.


Comment
IMG_1399.jpg

Sounds of eating

Open Field Farm February 25, 2020

We fed the cows hay for the last time (we hope) Sunday. I rode on the trailer pushing off flakes this time, instead of driving the tractor. I enjoyed being up close to the cows, watching and listening to them eating, jostling each other for space, and then settling in peacefully. On Monday, Jorge, Jesse, and Seth sorted off the bred cows from the rest of the herd and we are now grazing two groups.

The weather forecaster are hinting that a shift in weather may be coming soon and we are praying it does.

IMG_1388.jpg

This week’s pick list:

  • Cabbage

  • Winter squash

  • Spigariello

  • Beets

  • Chard

  • Carrots

  • Sugarloaf and Radicchio

  • Radish

  • Turnips

  • Rutabaga

  • Kohlrabi

  • Celeriac

  • Celery

  • Onions

  • Lettuce

  • Arugula

  • Parsnips

  • Leeks

  • Dried tea herbs

  • Dried ground peppers

  • Revolution Bread

  • Olive Oil!

IMG_1407.jpg

Lemony Braised Leeks and Chard, from butteredveg.com

  • 6 cups (about 2 large leeks), chopped

  • 1 tablespoon oil

  • 4 cups chard, half a bunch

  • 1/2 cup water, or vegetable stock if you have it

  • 1 tablespoon extra virgin olive oil, or more to taste

  • 1 tablespoon white wine vinegar, rice vinegar or white balsamic also okay

  • 1 tablespoon fresh lemon juice

  • 1 tablespoon grainy mustard, dijon also okay

  • 1 clove garlic, grated or crushed

  • 1 teaspoon Himalayan pink salt, or to taste

Trim the leeks. Retain 2 inches of the deep green part and discard or compost the rest (or use it for stock). Cut off the roots. Remove 1-2 outer layers of the leek if it is damaged or dirty. Slice the remaining leek in half lengthwise, and then chop into 1-inch lengths. Wash the leeks in a large bowl of cold water, swishing them around to loosen any dirt. Rinse and repeat if necessary. Scoop the prepared leeks from the water with your hands or a slotted spoon to avoid disturbing the dirt, which will have settled on the bottom of the bowl. Place leeks on a clean tea towel to air dry a little before using.

Chop the Swiss chard into 1-inch pieces and use the same bowl (with new water) to wash it. This time you can keep the chard in the bowl until it’s time to include it in the recipe.

In a small mixing bowl, combine all ingredients for the braising liquid.

Heat a large skillet on medium-high heat. Add vegetable oil and the prepared leeks. Sauté until the leeks turn golden brown. Scoop the chard from the water and add it to the skillet. Reduce the heat to medium low. Wait a few minutes for the temperature to reduce, then add the prepared braising liquid evenly over the leeks and chard. Stir to remove any stuck bits from the bottom of the pan. Reduce heat to low and cover. Cook for 15 minutes, until the leeks and chard stalks are nice and tender.

Place in a serving dish along with the braising liquid. Serve as a vegetable side with rice, pasta, or a whole grain. Enjoy the braised leeks and chard as one element of a nutritious healing bowl.

Comment
IMG_1309.jpg

Blue Skies

Open Field Farm February 18, 2020

While the clear weather has warmed us and the soil, we are hoping for more rain in the forecast soon. The drainages are slowly drying up and we are looking forward to the sound of running water in the future.

We are sowing the tomatoes, peppers, and eggplant for the tunnels this week, as well as another succession of lettuce, pac choy, fennel, and scallions. We are slowly getting the tunnels under control!

IMG_1386.jpg

This week’s pick list:

  • Cabbage

  • Winter squash

  • Kale

  • Beets

  • Chard

  • Carrots

  • Sugarloaf and Radicchio

  • Radish

  • Turnips

  • Rutabaga

  • Kohlrabi

  • Celeriac

  • Celery

  • Onions

  • Broccoli

  • Cauliflower

  • Pac Choy

  • Mustard Greens

  • Parsnips

  • Leeks

  • Dried tea herbs

  • Dried ground peppers

  • Revolution Bread

  • Olive Oil!

IMG_1378.jpg

PICKLED CHARD STEMS, from dishingupthedirt.com

  • 1 1/2 cups chopped chard stems (from about 1 large bunch of chard)

  • 2 teaspoons brown mustard seeds

  • 1 cup rice vinegar

  • 1/2 cup water

  • 3 1/2 Tablespoons honey

  • 1/2 teaspoon salt

  • 1/2 teaspoon peppercorns

Place the chopped chard stems in a glass bowl or large mason jar and set aside.

Toast the brown mustard seeds in a saucepan for about 1 minute. Add the vinegar, water, honey and salt. Bring to a boil. Reduce heat to low and simmer until the honey has dissolved, about 3 minutes. Remove the pan from the heat, add the peppercorns and let the brine cool for about 10 minutes.

Pour the brine over the chopped chard and cover the jar with a secure lid. Refrigerate for at least 4 hours before enjoying.

*Pickled chard stems will keep in the fridge for up to 3 weeks in a secured glass jar *Use this recipe as a guide and adjust measurements and ingredients as necessary

Comment
IMG_1306.jpg

Purple

Open Field Farm February 11, 2020

We will have purple cauliflower in the barn this week, the first time for us that the overwintering cauliflower has been a success! When you buy this seed from the company, they have a qualifier that the prospect of the plant actually making a head is hit and miss depending on the year and the weather.

Even though we have had a long break in rain, the soil is still cold and very moist. Many of the vegetables have a purple hue to them from the stress of the growing conditions. It is interesting that both the broccoli and cauliflower that grow at this time are purple as well!

And then in the shade of the daffodils, I found this sweet purple crocus.

IMG_1301.jpg

This week’s pick list:

  • Cabbage

  • Winter squash

  • Spigariello

  • Beets

  • Chard

  • Carrots

  • Sugarloaf, and Radicchio

  • Radish

  • Turnips

  • Rutabaga

  • Kohlrabi

  • Celeriac

  • Celery

  • Onions

  • Broccoli

  • Cauliflower

  • Pac Choy

  • Arugula

  • Parsnips

  • Leeks

  • Dried tea herbs

  • Dried ground peppers

  • Revolution Bread

IMG_1305.jpg

Whole Wheat Blender Pancakes, from melskitchencafe.com

  • 1 cup wheat berries/kernels

  • 1 cup buttermilk (you can substitute a blend of 50% yogurt and 50% milk)

  • 1/2 cup milk

  • 2 large eggs

  • 2 teaspoons sugar

  • 1 tablespoon baking powder

  • 5 tablespoons butter, melted

  • 3/4 teaspoon salt

Combine the wheat berries/kernels and the buttermilk in a blender and blend on high for 3 minutes, until the mixture is smooth and thick.

Add the 1/2 cup milk and continue to blend for 2 minutes. Add the remaining ingredients and blend until the batter is smooth.

Cook the batter on a hot griddle for pancakes or in a waffle iron for, well, waffles!

Comment
IMG_1277.jpg

A shift

Open Field Farm February 4, 2020

As we cross over from January into February, it begins to feel as if we are pulling away from the heart of winter and moving towards spring. The days are longer than 10 hours, allowing for more plant growth. In the fields, there is often a shift in the crops and many begin to go to seed.. Most of the plants that we are harvesting were planted last August and September. They have hung on through the frost and short days; with the first warm stretch they burst into the next phase.

IMG_1244.jpg

This week’s pick list:

  • Cabbage

  • Winter squash

  • Spigariello

  • Beets

  • Chard

  • Carrots

  • Escarole, Sugarloaf, and Radicchio

  • Radish

  • Turnips

  • Rutabaga

  • Kohlrabi

  • Celeriac

  • Celery

  • Onions

  • Broccoli

  • Parsnips

  • Dried tea herbs

  • Dried ground peppers

  • Revolution Bread

IMG_1276.jpg

Celeriac Risotto, from everylastbite.com

  • 3 cups cubed butternut squash

  • 2 tbsp olive oil

  • 1/4 tsp salt

  • 100 grams diced Pancetta or Bacon

  • 1 large celery root celeriac, 4 cups celeriac rice

  • 2 cloves garlic minced

  • 1 large onion finely chopped

  • 3 cups greens shredded into small pieces

  • 1 cup chicken or vegetable broth

  • 1 cup milk

  • Parmesan cheese (optional)

Preheat the oven to 175 degrees (350 degrees Fahrenheit). Place the cubed butternut squash on a baking sheet and drizzle with 1 tbsp olive oil and salt. Bake in the oven for 20-25 minutes until the butternut squash is tender and golden in color.

While the butternut squash is baking, peel the celeriac and cut it into chunks. Place the cut up celeriac into a food processor and pulse. The key is not to over blend, you want it to break down into small pieces about the size of rice.

In a large pot on medium heat add 1 tbsp olive oil and cook the pancetta until its crisp. Once cooked, remove it from the pot and set aside.

Add the garlic and onion to the pot and cook for approximately 5 minutes until the onion has softened. Add in the greens, riced celeriac, broth and milk and let cook gently as to not curdle the milk for approximately 10 minutes until the liquid has evaporated and the celeriac is tender.

Add in the pancetta and butternut squash 1-2 minutes before serving so that they become warm. Finish with grated parmesan cheese. if you wish.

Comment
IMG_1254.jpg

Halfway

Open Field Farm January 28, 2020

The big dam has filled halfway, which is a contrast to this time last year when it was overflowing. Still it does feel as we have plenty of time left for it to recharge.

The grass is still short enough that you can see the patterns in the field of how the water moves. There are patches of different plants in the wetter and drier spots, as well as changes under the trees and on the hillsides.

We are meeting this week and last to reflect on the past season and set goals for the coming one. The slower pace of winter allows us space to think, plan, and dream.

IMG_1257.jpg
  • Cabbage

  • Winter squash

  • Kale

  • Beets

  • Chard

  • Carrots

  • Leeks

  • Escarole, Frisee, Sugarloaf, and Radicchio

  • Radish

  • Turnips

  • Rutabaga

  • Kohlrabi

  • Celeriac

  • Celery

  • Onions

  • Broccoli

  • Brussel sprouts

  • Parsnips

  • Dried tea herbs

  • Dried ground peppers

  • Revolution Bread

IMG_1238.jpg

Tourtiere, from davidlebovitz.com

For the dough

  • 2 1/2 cups (325g) flour

  • 1 teaspoon sugar

  • 1/2 teaspoon salt

  • 8 ounces (230g, 1 cup) unsalted butter, cubed and chilled

  • 6 tablespoons (90ml) ice water, plus more if necessary

  • 1 tablespoon white or cider vinegar

For the filling

  • 1 pound (450g) ground beef

  • 1 pound (450g) ground pork (or use all ground beef)

  • 1 large onion, peeled the diced

  • 1 large russet potato, diced (You can also add other root vegetables.)

  • 1 teaspoon salt

  • 1/2 teaspoon black pepper

  • 1/2 teaspoon ground cinnamon

  • 1/2 teaspoon freshly grated nutmeg

  • 1/4 teaspoon ground allspice

  • 1/4 teaspoon ground cloves

  • 1/4 teaspoon cayenne or red chile powder

  • 1 bay leaf

  • 1 cup (250ml) beef or chicken stock, or water

  • 1 egg yolk, lightly beaten

To make the dough

1. In the bowl of a stand mixer fitted with the paddle attachment (or in a food processor, or in a large bowl using a pastry blender), mix the flour, sugar, and salt. Mix in the butter at low-to-medium speed until the pieces of butter are the size of small peas. Add the ice water and vinegar and mix on low speed just until the dough comes together, but do not overwork it. For that reason, I often do the last of the mixing by hand. If the dough is too dry to come together, add another spoonful or so of water.

2. Divide the dough in two and shape each half into a disk. Wrap and refrigerate the disks for at least 1 hour. (The dough can also be refrigerated for up to three days, or frozen for up to three months.)

To make and assemble the tourtière

3. In a large skillet with a lid, or a Dutch oven, heat the ground beef and pork over medium heat. Cook, stirring to break up the meat, until it's browned and cooked through. With a slotted spoon, remove the meat to a plate or bowl, and drain from the pan all but 2 tablespoons of fat. (Any meaty juices that are in the pan should be reserved to add later.)

4. Add the diced onion to the pot and cook until translucent, about 5 minutes. Stir in the potatoes, salt, spices, and bay leaf, coating the potatoes and onions with the spices. Stir the cooked beef and pork back into the pot along with the stock, and any reserved juices from the previous step.

5. Bring to a low boil, then reduce the heat to a simmer, cover and cook gently for 30 minutes, stirring once or twice while cooking. Transfer the mixture to a small bowl, remove the bay leaf, and cool to room temperature or chill in the refrigerator.

6. To assemble the tourtière, remove the dough from the refrigerator and on a lightly floured surface, roll one disk of the dough into a 13-inch (33cm) circle. Gently drape it into a deep 9- to 10-inch (23cm) pie plate or pan. (The authors say this can also be baked in a similar-sized skillet, with an ovenproof handle.) Scrape the meat mixture into the dough-lined pan, then roll out the second disk of dough to the same size, and drape it over the pie. Tuck the two pieces of dough that are overhanging the sides under the rim, inside the pie plate. Crimp the edges and chill the pie for one hour, or freeze it for 15 minutes.

7. To bake the tourtière, preheat the oven to 375ºF (190ºC). Brush the egg yolk over the top of the pie dough, cut a hole in the center, and make any decorative marks you wish in the top with the tip of a sharp paring knife. Bake the pie until the top is golden brown, about 45 to 50 minutes. If necessary, you can run the pie under the broiler a minute or so to get it to brown nicely. Let cool 10 minutes before serving.

Comment
IMG_1224.jpg

Potatoes

Open Field Farm January 21, 2020

Most of the vegetables coming out of the fields are sweet from the frost and lush with all the rain. Finding them can be like searching for treasure, as the weeds and grass are growing up around them. The chicories and chard are the rare splotches of red among the different hues of green that fill the field.

We have already eaten through our much smaller harvest of potatoes from this summer. It is a stark contrast to last year when we had potatoes into July when the new crop came in. We hope that you savored the ones we had and look forward to them returning in July. We are growing new varieties this year and have made adjustments in our planning for a more abundant crop.

IMG_1223.jpg

This week’s pick list:

  • Cabbage

  • Winter squash

  • Lettuce

  • Kale

  • Beets

  • Chard

  • Carrots

  • Leeks

  • Scallions

  • Escarole, Frisee, Sugarloaf, and Radicchio

  • Radish

  • Turnips

  • Rutabaga

  • Kohlrabi

  • Celeriac

  • Celery

  • Onions

  • Broccoli

  • Brussel sprouts

  • Parsnips

  • Dried tea herbs

  • Dried ground peppers

  • Revolution Bread

IMG_1209.jpg

Green Falafel, from 101cookbooks.com

  • 1 pound kale, washed and trimmed

  • 2 eggs

  • 5 cloves garlic

  • 1 cup cooked chickpeas

  • 1 cup breadcrumbs

  • 1/2 cup / 20g grated Parmesan

  • 1 teaspoon baking powder

  • 1/4 + teaspoon fine grain sea salt

  • zest of one lemon

Preheat the oven to 450°F. Place a large skillet or pot over high heat. When hot, add the spinach, in batches if necessary. Stir until collapsed and most of the moisture has evaporated. Transfer to a cutting board, and chop well. The more chopped, the better.

Combine the eggs, garlic, chickpeas, breadcrumbs, cheese, baking powder, and salt in a blender. Blend until combined. Transfer to a large bowl, add the lemon zest and chopped spinach, and stir until uniform.

With your hands, form the mixture into small, 1 1/2-inch balls. You should end up with 20-30-ish balls. Place on a baking sheet, smush them down a bit, and put in the oven for 20 minutes or so, until very golden, flipping once along the way. If you don't bake all of them, freeze the remaining. Alternately, you can cook the falafel in a skillet with a splash of olive oil.

Serve the falafel with a sauce, or dipping sauce, or with additional components as part of a falafel bowl. Enjoy!

Comment
IMG_1204.jpg

Rain at night

Open Field Farm January 13, 2020

It has been raining lightly at night off and on for the past week. It feels as if you wake up to a present, or a pleasant surprise, more puddles and running water than the day before. The large dam still needs some big storms to fill but the slow and steady rains are also beneficial.

We finished the seed order, except for lettuce, which is still pending. Working through the seed order, is like a review of the season, remembering which varieties we loved and which we did not. It is also a reminder of the success and failures that happen on all farms, even for the seed companies. Some of our favorite varieties were not available this year, because the seed crop did not make it and sometimes because it is no longer popular enough for the companies to continue to grow it. We, of course, could not exist without the seed companies and are so grateful for the work they do to maintain the varieties and constantly improve them.

IMG_1214.jpg

This week’s pick list:

  • Cabbage

  • Winter squash

  • Fennel

  • Kale

  • Beets

  • Chard

  • Potatoes

  • Parsley

  • Carrots

  • Leeks

  • Scallions

  • Escarole, Frisee, Sugarloaf, and Radicchio

  • Radish

  • Turnips

  • Rutabaga

  • Kohlrabi

  • Celeriac

  • Celery

  • Onions

  • Broccoli

  • Brussel sprouts

  • Parsnips

  • Dried tea herbs

  • Dried ground peppers

  • Revolution Bread

IMG_1227.jpg

Jingalov Hats, from nytimes.com

FOR THE DOUGH:

  • 1 ½ cups flour, plus more for dusting

  • 1 teaspoon kosher salt

  • ⅔ cup lukewarm water

  • Sunflower oil or other neutral oil, for greasing

FOR THE FILLING:

  • 2 pounds chard, tough stems discarded

  • 4 packed cups fresh herbs

  • 4 packed cups sorrel

  • 6 spring onions (or 10 scallions), thinly sliced

  • 3 tablespoons sunflower oil or other neutral oil

  • 2 tablespoons fresh lemon juice

  • 2 teaspoons sweet paprika

  • 2 teaspoons kosher salt

  • 2 handfuls pomegranate seeds (optional)

Prepare the dough: In a medium bowl, combine 1 1/2 cups flour and the salt. Pour the lukewarm water into a large bowl, then gradually add the flour mixture, using your hands to incorporate. The dough will be sticky.

Dust the counter with flour, turn dough onto it and knead gently until the surface becomes smooth and the dough stops sticking to your hands and counter, about 5 minutes. Roll the dough into a ball, place it in a lightly oiled bowl, turn it to coat, then cover it with a kitchen towel. Let it rest at room temperature for 20 minutes to 1 hour.

Prepare the filling: Wash the greens, and use a salad spinner to dry them well. Chop the greens finely. Mix with spring onions, oil, lemon juice, paprika, salt and pomegranate seeds (if using), and set aside. Divide the rested dough into 4 portions, about 3 ounces each, and form each into a ball.

On a lightly floured work surface, roll a ball into a very thin circle, about 8 inches wide, adding more flour as needed to prevent the dough from sticking. Place about 2 cups of filling in the center, then use your hands to pat it down into a round, leaving about a 1-inch border of dough. Pick up two opposite sides of the dough, and pinch them together over the center of the filling, from top to bottom, so the middle is wide and the ends form points.

Firmly pinch the seam to make sure it’s sealed, then turn the dough over, and gently flatten it out with the palm of your hand so it resembles a deflated football, sealing any holes in the dough. It should be about 1/4- to-1/2-inch thick. If it’s thicker, use a rolling pin to smooth it out a little. Pinch shut any holes in the dough, then place on parchment or a lightly floured surface. Repeat with the remaining balls of dough.

Heat a large cast-iron pan over medium-high. Working with one dough portion at a time, place the dough seam-side down in the center of the pan. Lower the heat to medium, and cook for about 3 minutes, until cooked and lightly browned in places. Flip, and cook the other side for 2 minutes. If the dough seems raw in places, flip and cook evenly. Repeat for the rest of the jingalov hats, and serve warm or at room temperature.

Comment

Grass

Open Field Farm January 7, 2020

When we awoke Sunday morning after returning home late Saturday evening, we were grateful to see the farm gloriously green. In contrast on the frosty mornings, the farm is white and almost appears to have a dusting of snow. By afternoon though, we are often in t-shirts.

We are planting another round of lettuce, pac choy, fennel, and scallions in the tunnels. There is a gopher that has taken up residence in them, so we are also working to stop the damage.

This week’s pick list:

  • Cabbage

  • Winter squash

  • Fennel

  • Kale

  • Beets

  • Chard

  • Potatoes

  • Parsley

  • Carrots

  • Leeks

  • Scallions

  • Escarole, Frisee, Sugarloaf, and Radicchio

  • Radish

  • Turnips

  • Rutabaga

  • Kohlrabi

  • Celeriac

  • Celery

  • Onions

  • Broccoli

  • Brussel sprouts

  • Parsnips

  • Dried tea herbs

  • Dried ground peppers

  • Revolution Bread

IMG_1189.jpg

Homemade Egg Noodles, thespruceeats.com

  • 1 cup flour (we do sift out the bran from our flour when we make noodles)

  • 2 large eggs

  • 1/2 teaspoon fine sea salt

Combine the flour and salt in a large shallow bowl or on a clean work surface. Make a well in the center, almost like a "bowl" of flour to hold the eggs, and crack the eggs into it.

Use a fork to beat the eggs and then gradually start incorporating the flour into the eggs (as you beat them, they will slowly but surely take up some flour from along the edge of where the eggs meet the flour).

Keep stirring and pulling in more flour until a solid dough forms. The dough will be sticky. Don't worry, you'll be working in more flour in a moment. Too much flour now and the extra flour needed to roll out the noodles will lead to an oddly dry, rather than tender, noodle in the end.

Turn the dough out onto a well-floured work surface. With well-floured hands, knead the dough, incorporating more flour as necessary to keep it from sticking to either the work surface or your hands, until the dough is smooth and firm and no longer sticky. This takes 5 to 10 minutes for most people.

Wrap the dough with plastic wrap and chill it for at least 30 minutes and up to overnight.

Divide the dough into 2 pieces and work with one half of the dough at a time.

On a well-floured surface roll out the dough to the desired thickness (anywhere from 1/4-inch to paper-thin—the call is yours!). Be sure to rotate, or otherwise move the dough, between each pass of the rolling pin to keep the dough from sticking to the work surface underneath. Sprinkle everything with flour—including lifting the dough and flouring the work surface again—as necessary to keep the dough from sticking.

Use a sharp knife or pizza cutting wheel to cut the noodles. You can make them as narrow or wide as you like but cut them as evenly as possible to ensure a uniform cooking time.

Lay the noodles on a cooling or drying rack and let them sit until ready to cook. Repeat rolling and cutting with the remaining half of the dough.

Boil the noodles in well-salted water until tender to the bite. Drain and serve with butter or cheese, with stews, or in soups.

Tips

You can let these uncooked noodles air-dry until completely dry and store them in an air-tight container at room temperature for up to a month.

You may be tempted to store the uncooked noodles in the fridge in an effort to keep them "fresh." Avoid this temptation. It's strange, but true that they keep much better dried than they do in the refrigerator, where they will get soggy.

If you have a pasta roller, you can use that instead of a rolling pin, when rolling out the dough, if you like. This will lead to more evenly formed noodles.

Comment
IMG_1150.JPG

Moving

Open Field Farm December 31, 2019

Seth and I are skiing in Colorado while Jesse, Jorge, Pascale, and Kelsey are skillfully caring for the all the animals, plants, and buildings at the farm. We are grateful for their hard work and support and to be in the snow!

As we transition crews, everyone on the farm seems to be moving. We are rearranging the houses and getting ready to welcome new employees to the farm. We are excited for the beginnings and to have everyone settled in their new spaces.

We are working to clear the tunnels, in preparation to plant next week. We have a bounty of beautiful cabbage in the field that we are slowly harvesting to store. It is nice to have a break in the rain for the fields to dry a little as some crops have started to suffer from the saturated soils.

IMG_1149.JPG

This week’s pick list:

  • Cabbage

  • Winter squash

  • Fennel

  • Kale

  • Beets

  • Chard

  • Potatoes

  • Parsley

  • Carrots

  • Lettuce

  • Escarole, Sugarloaf, and Radicchio

  • Radish

  • Turnips

  • Rutabaga

  • Kohlrabi

  • Celeriac

  • Celery

  • Onions

  • Brussel sprouts

  • Parsnips

  • Dried tea herbs

  • Dried ground peppers

  • Revolution Bread

IMG_1152.JPG

SPICED BUTTERNUT SQUASH BISCUITS, from dishingupthedirt.com

  • 2 cups flour

  • 2 1/2 teaspoons baking powder

  • 1 teaspoon ground cinnamon

  • 1/4 teaspoon ground cloves

  • 1/4 teaspoon ground nutmeg

  • 1/4 teaspoon ground ginger

  • 1/2 teaspoon salt

  • 5 tablespoons chilled unsalted butter, cut into small pieces

  • 1/3 cup buttermilk

  • 3/4 cup roasted and mashed butternut squash puree (or any cooked squash puree)

  • 3 tablespoons honey, warmed until pourable (make sure it's not hot though)

Preheat the oven to 400F

Combine flour, baking powder, spices and salt in a large bowl; cut in butter with a pastry blender or 2 knives until mixture resembles coarse meal. Chill in the fridge for 10 minutes.

Combine buttermilk and honey until well mixed. Add the squash puree and buttermilk mixture to the large bowl with the flour mixture; stir until well incorporated making sure not to over-mix.

Turn dough out onto a lightly floured surface; knead 8-10 times (this will help achieve lovely layers of butter for maximum flakiness). While kneading/folding the dough sprinkle extra flour if the dough is too sticky. Pat or roll out to 1-in. thickness; cut with a floured 2-in. biscuit cutter or mason jar. Place biscuits close together on a a lightly greased baking sheet and bake for 14-18 minutes or until lightly browned.

Comment
  • Blog
  • Older
  • Newer

O.F.F. Blog

Each week we will post the newsletter, including the pick list, recipes and farm news. 

Sign up with your email address to receive our weekly newsletter.

We respect your privacy.

Thank you!
facebook
  • Contact
  • Employment
  • Photos
OFF Landscape 3.png

Open Field Farm

Open Field Farm is a community supported farm in Petaluma, California, raising grass fed Corriente beef, pastured eggs, mixed vegetables, flowers, herbs, and dry corn.

Open Field Farm is a community supported farm in Petaluma, California, raising grass fed Corriente beef, pastured eggs, mixed vegetables, flowers, herbs, and dry corn. All of our produce is distributed through our CSA program, which includes free choice, on farm pickup, and some pick your own crops. 

Open Field Farm | 2245 Spring Hill Road, Petaluma, CA 94952, USA

facebook